1.5. Installing MedeA on Windows and Linux from ISO
Contents
| download: | pdf |
|---|
1.5.1. Introduction
This section goes over the steps of performing a fresh installation of MedeA on Windows and Linux, respectively, from a downloaded ISO image of the installation DVD.
Note
This section is for a new installation of MedeA on a computer. For updating an existing MedeA version to 3.8 from the ISO image of the installation DVD, please see Section Update Existing MedeA.
On Windows, it is necessary to install MedeA with the graphical installer, while on Linux, there is an option to install only the JobServer and TaskServer without the graphical installer, that is, fully on the command-line.
Note
Whenever possible, please install MedeA with the graphical user interface, and the option to install MedeA on the command-line is experimental and should be reserved for administrator staffs and experienced users to install only the JobServer and TaskServer.
1.5.2. Regular Installation with the Graphical Installer
Installing MedeA on Windows and Linux using the ISO image with the graphical Installer are very similar. The only differences lie in mounting the ISO image and starting MDMaintenance with and without administrator rights:
- On Windows, please start MDMaintenance with administrator rights
- On Linux, please start MDMaintenance without administrator rights
1.5.2.1. Mounting the ISO image on Windows
Warning
Windows does not support mounting ISO images from a shared drive (including Dropbox and virtual machine’s shared folders). Therefore, please copy the ISO image to the Windows computer’s local drive.
Go to the folder where you saved the downloaded ISO image. On Windows 8 or Windows 10 right-click on the ISO file and select Mount would mount the ISO image:

Hint
If you are experiencing any problems with mounting the ISO image on Windows with its native Mount, we recommend using WinCDEmu
Go to the mounted drive, DVD Drive (E:) in the example below, and right-click on MDMaintenance >> Run as administrator:

Click Yes: to proceed with the installation as a standard user but with administration rights:

1.5.2.2. Mounting the ISO image on Linux
Note
MedeA and its graphical installer, MDMaintenance, work well with X11 display server but not with Wayland display server. Please log out and select X11 upon logging back in.
Before mounting the ISO image on Linux, install necessary graphics drivers:
On Debian-based systems (Ubuntu/Debian/Mint):
sudo apt-get install libxss1 libglu1-mesa freeglut3
On RPM-based systems (CentOS/RHEL/Fedora/SUSE):
sudo yum install libXScrnSaver mesa-libGLU freeglut
Use an existing directory or create a directory for the mounted drive, e.g.:
sudo mkdir -p /media/medea
Mount the ISO image as a loop device:
sudo mount -o loop MedeA_3.6.0.iso /media/medea
- Alternatively, you can also use the Disk Image Mounter tool in Linux OS (e.g. Ubuntu) to mount the ISO image.

Move to the mounted drive and inside the
Linux-x64_64directory start MDMaintenance without sudo rights:cd /media/medea/Linux-x86_64 ./MDMaintenance
Note
MedeA on Windows and Linux look and behave the same way. So, unlike many Linux programs, the entire MedeA distribution is in one folder, including databases, executables, and generated results. The location of temporary files can be changed any time; the best place is to install in a directory owned by the actual medea user or group.
1.5.2.3. Installation Process
The Materials Design Software Manager window appears. Choose the option Install MedeA Software and click Start:

You have the option to choose from:
- Standard installation, which will install everything:

- Custom Installation, with which you can choose what and where to install:

Note
The drive or partition you select for MedeA should have at least 20 GB available for storing results of calculations performed with MedeA.
Warning
On Windows, you cannot install on a user drive, which is unmounted after logging out.
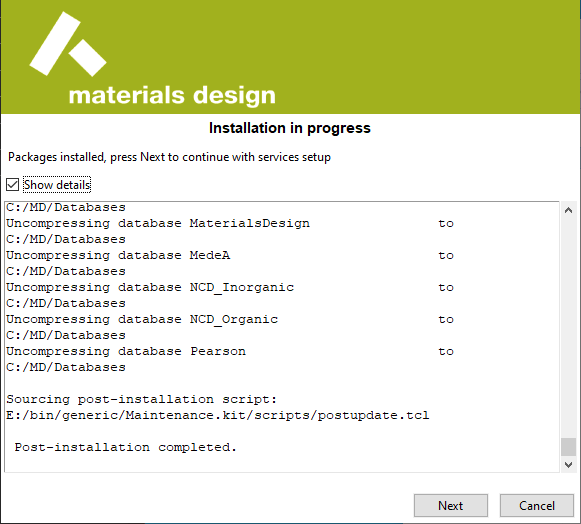
Make a choice and click Next, and the installation begins:

Click Next to finish the installation of the GUI:
The installation of JobServer and TaskServer as services follow:

On Linux, since MDMaintenance was not started with administrator rights, an option to enter your sudo password appears:

Enter your sudo password and click the Check button and the Create service buttons are enabled.
Click the Create service buttons then the Start service buttons for the JobServer and the TaskServer to install JobServer and TaskServer as services running in the background

The next step in the installation process is to create shortcuts:

The installation is complete:
1.5.2.4. Creating Shortcuts
If by any chance no shortcuts were created on the Desktop or in the Windows Start Menu, you can follow these steps to create them at any time after the actual installation.
Windows:
Go to the MedeA installation directory, e.g.,
C:\MD\Windows-x86_64, right-click onMDMaintenanceand select Run as administrator:
Linux:
Go to the MedeA installation directory, e.g.,
/home/[username]/MD/Linux-x86_64and start MDMaintenance:./MDMaintenance
Click the option Install in Applications Menu and click Start:

Make preferred selections and click Create:
The shortcuts are installed on the Desktop and in the Applications menu
Use any of the shortcuts to start MedeA and send the license parameters as plain text to support@materialsdesign.com:

1.5.3. Command-line Installation on Linux
Whenever possible, please install MedeA with the graphical user interface, and the option to install MedeA on the command-line is experimental and should be reserved for administrator staffs and experienced users to install only the JobServer and TaskServer.
1.5.3.1. Mounting the ISO Image on Linux
Use an existing directory or create a directory for the mounted drive, e.g.:
sudo mkdir -p /media/medea
Mount the ISO image as a loop device:
sudo mount -o loop MedeA_3.6.0.iso /media/medea
1.5.3.2. Updating MedeA on the Command-Line
Move to the mounted drive and inside the
Linux-x64_64directory start MDMaintenance without sudo rights:cd /media/medea/Linux-x86_64 ./MDMaintenance.x -install
Hint
You can use
./MDMaintenance -helpto show a list of optionsChoose the installation directory:
=== Starting Materials Design products installation ===

Perform standard installation in folder (yes):   /home/medea/MD
or custom installation (no)
yes / no [yes]:
Enter
yesto install in the default directory andnoto a custom directory.Hit
returnand follow the prompt:Install MedeA (425.344 MB)? yes / no [yes]: Install Databases? yes / no [yes]: no Install JobServer (334.655 MB)? yes / no [yes]: yes Install TaskServer (2694.75 MB)? yes / no [yes]: yes
Hint
The JobServer and TaskServer do not need structure databases (neither COD, ICSD, NCD, nor Pearson)
Install JobServer and TaskServer as services:
=== JobServer and TaskServer services ===

You can install JobServer and TaskServer services now or later on from the MD Maintenance tool
Install service(s) now?
yes / no [yes]:
Enter the sudo password to install the JobServer and TaskServer:
=== Starting Materials Design services control ===

You need a sudo password to control MD services.
Password:
Choose if you would like to quit the services manager or create an extra TaskServer:
You can do the following:
  0 Quit services manager
  1 Stop TaskServer service
  2 Stop JobServer service
  3 Create an extra TaskServer
Decide whether to install shortcuts or not and where to install them if your choice is yes
You can do the following:
    0: proceed with selected shortcuts
    1: quit without changes
    2: unselect install to Applications menu
    3: select install to Desktop
    4: unselect shortcut MedeA
    5: unselect shortcut Maintenance
    6: unselect shortcut JobServer
    7: unselect shortcut TaskServer
    8: unselect shortcut Manual
Finish installation
If you have chosen to create the JobServer and TaskServer, then move to the directory, e.g.
~/MD/Linux-x86_64and enter:sudo ./MDMaintenance.x -createjobserver sudo ./MDMaintenance.x -createtaskserver
The JobServer and TaskServer daemon scripts are created in the
/etc/systemd/systemdirectory.
Note
If you need to install JobServer and TaskServer on a shared file system on HPCs, you can execute the above
commands with sudo or as root to install JobServer and TaskServer on a shared location,
but ensure to change the ownership of the installed MD directory to the standard user
(e.g. medea or the user’s username).
| download: | pdf |
|---|