1.6. Updating an Existing MedeA Installation
Contents
| download: | pdf |
|---|
1.6.1. Introduction
This section describes the procedure to update your existing MedeA installation to MedeA 3.8. If you are installing MedeA for the first time, please refer to the Sections Installing MedeA on Windows with the Windows Installer and Installing MedeA on Windows and Linux from ISO.
If you are updating to 3.8 from MedeA 3.1.0 and newer, you can use the Windows Installer or the ISO images available for download from http://my.materialsdesign.com/download-medea-3.8. You can also use the Update from the Web feature from the MedeA Maintenance program.
If you are updating to 3.8 from MedeA 3.0.X and older, please only use the ISO images available for download from http://my.materialsdesign.com/download-medea-3.8. The Update from the Web feature from the MedeA Maintenance program is not supported.
Updating MedeA will not affect any of your saved jobs, settings, results, structures, flowcharts, license.txt, *.options files, queueing scripts such as PBS.tcl, and any other user data. If you would like to backup your jobs, backup the following:
- The Jobs folder which is in MD/2.0 by default for MedeA 3.0 and older and MD for MedeA 3.1 and newer
- MDJobs.db in MD/Databases
Warning
MedeA 3.8 requires an updated license from MD Support. Your licenses for MedeA 3.4, 3.3, 3.2, 3.1, 3.0, 2.22, and previous versions will not work for version 3.8 or future versions! If you are on maintenance, please send your license parameters to support@materialsdesign.com. If you have licenses for MedeA 3.2, 3.1, 3.0, 2.22, or previous versions and your maintenance expired, updating to MedeA 3.8 would result in your MedeA to stop working!
Since MedeA 3.1 the 2.0 folder is deprecated. All content of the 2.0 folder is moved
one directory up to the root installation directory of MedeA, e.g. C:\\MD or ~/MD.
That implies that in the update procedure the empty 2.0 folder will be removed.
1.6.2. Update from the Windows Installer
Warning
Skip to the next section, Update from ISO Image, if you are updating from MedeA 3.0.X and older.
The first step is to stop the existing JobServer and TaskServer that are running. Go to the Windows Start Menu >> Materials Design, right-click on MedeA Maintenance >> More >> Run as administrator
Click Manage MD Services, and click Stop service buttons to stop the JobServer and TaskServer

Click Continue to return to the home menu and click Exit again to close MDMaintenance
Go to the folder where you downloaded the MedeAInstaller3.8.0.exe Windows Installer, right-click and select Run as administrator

The installer is signed and verified to be from Materials Design, Inc.

Confirm the directory with the existing version of MedeA:

Choose MedeA 3.8.0 platform to update the GUI, JobServer, and TaskServer. Click Next

Define the Start Menu folder name:
By default the folder is called Materials Design but you can change it to any other name such as Materials Design 3
Click Next and proceed with the installation by following the prompted steps
In the middle of the update, the installer asks whether to update the MaterialsDesign.db database. The intention of the Materials Design database is to store custom structures, i.e. structures that you created. In case you stored structures in the Materials Design database, confirm with No. Confirm also with No in case you are uncertain. In case you never stored anything in the Materials Design database and you are sure, confirm with Yes.

Allow firewall access for the JobServer and TaskServer
The update process is complete. Launch MedeA and send MD support <support@materialsdesign.com> the new license parameters.

1.6.3. Update from ISO Image
With the ISO image, you can update MedeA from any version on Windows and Linux without having access to the Internet.
First step is to stop the existing JobServer and TaskServer that are running:
On Windows, go to the Windows Start Menu >> Materials Design, right-click on MedeA Maintenance >> More >> Run as administrator
On Linux, go to <install_dir>/Linux-x86_64 and start MDMaintenance with sudo rights:
sudo ./MDMaintenance
With MedeA 3.1.0 and newer:

- Click Manage MD Services and the Stop Service buttons to stop the JobServer and TaskServer.
With MedeA 3.0.X and older:

- Click Manage Services on Windows and Manage Daemons on Linux.
- Click Stop Service buttons to stop the JobServer and TaskServer.
- Exit MDMaintenance.
1.6.3.1. Mounting the ISO Image on Windows
Warning
Windows does not support mounting ISO images from a shared drive (including Dropbox and virtual machine’s shared folders). Therefore, please copy the ISO image to the Windows computer’s local drive.
Go to the folder where you saved the downloaded ISO image. On Windows 8 or Windows 10, right-click on the ISO file and select Mount mounts the ISO image:

Hint
If you are experiencing any problems with mounting the ISO image on Windows with its native Mount, we recommend using WinCDEmu
Open the mounted drive, DVD Drive (E:) in the example below, and right-click on MDMaintenance >> Run as administrator:

Click Yes to proceed with the installation as a standard user but with administration rights:

1.6.3.2. Mounting the ISO Image on Linux
Note
MedeA and its graphical installer, MDMaintenance, work well with X11 display server but not with Wayland display server. Please log out and select X11 upon logging back in.
Use an existing directory or create a directory for the mounted drive, e.g.:
sudo mkdir -p /media/medea
Mount the ISO image as a loop device:
sudo mount -o loop MedeA_3.8.0.iso /media/medea
Open the mounted drive, move to the
Linux-x64_64directory, and start MDMaintenance without sudo rights:cd /media/medea/Linux-x86_64 ./MDMaintenance
Note
MedeA on Windows and Linux look and behave the same way. So, unlike many Linux programs, the entire MedeA distribution is in one folder, including databases, executables and generated results. The location of temporary files can be changed any time; the best place is to install in a directory owned by the actual medea user or group.
1.6.3.3. Updating MedeA on Windows and Linux
Despite some subtle differences in paths and directories, updating process on Windows and Linux are mostly the same.
The Materials Design Software Manager window appears. Choose the option Update an existing MedeA installation and click Start:

If updating from MedeA 3.1.0 or newer, skip to step 6. If updating from MedeA 3.0 or older, continue with step 3.
The
2.0folder is deprecated. Set the Installation path to the current installation directory:
In the update process, all content of the
2.0folder will be moved one directory up. As the last step the empty2.0folder will be removed. Click OK to proceed:
Once the previous step is completed, the installer will wait for your OK to restart MDMaintenance:

If MDMaintenance does not restart automatically, click Quit to close the current instance of MDMaintenance. To continue, start the MDMaintenance program with administrator rights.
After MDMaintenance is restarted choose the option Update an existing MedeA installation and click Start
Choose the directory where you have the MedeA installed, click Next and MDMaintenance starts the checking process:

After the checking step, click Next to proceed with the update.

Click Next to finish the update:

Hint
Click Show details to see the list of changes and citation information
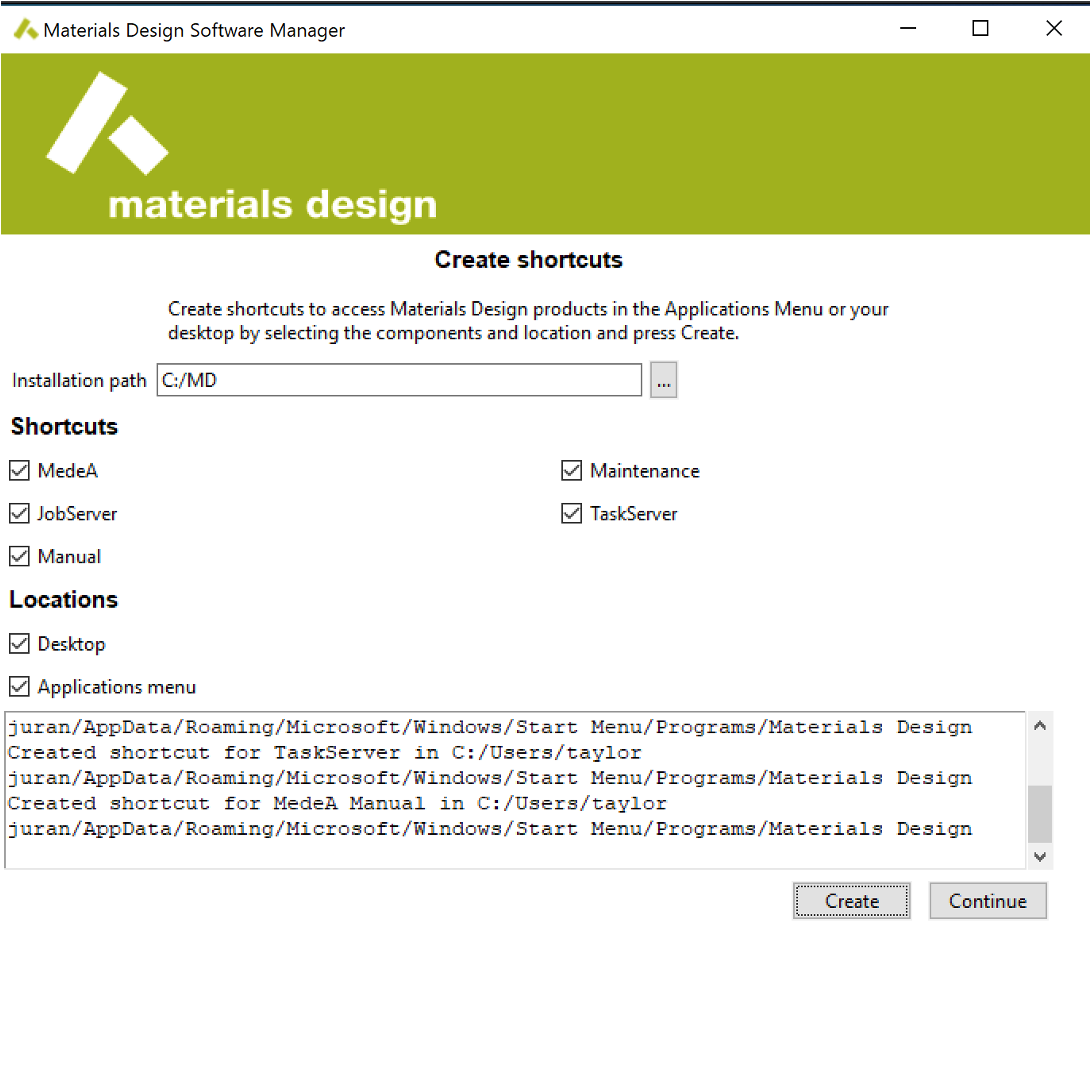
This returns to the main menu of the Materials Design Software Manager window. Choose Install in Application Menu and click Start to install menu shortcuts and icons in the dekstop and the application menu. Make your selections and click Create:
Click Continue to exit and then Quit
On Windows, this is the last step: use the newly created/updated MDMaintenance from the desktop or the application menu (Materials Design menu) to start MDMaintenance as administrator and start the JobServer and TaskServer with the Start service buttons.
- If the JobServer and TaskServer web pages at http://localhost:32000 and http://localhost:23000, respectively, are still of the 3.0 version, start MDMaintenance again and follow steps 2-5 below to remove and re-create the JobServer and TaskServer services.
On Linux, since the JobServer and TaskServer service scripts are moved from the directory
/etc/init.dto the directory/etc/systemd/system, there is one additional step to re-create the JobServer and TaskServer services:Start MDMaintenance from the installation directory (e.g. /home/<username>/MD/Linux-x86_64) without sudo rights
./MDMaintenance.x
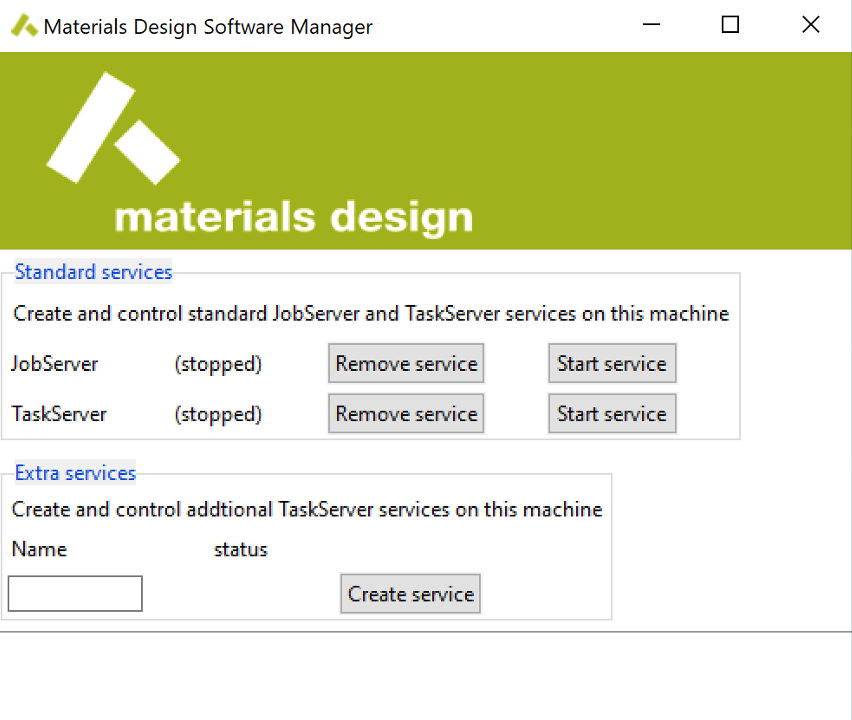
Check Manage MD service and click Start
Enter your admin/sudo password in the Sudo password box and click Check
Click the Remove service buttons for both the JobServer and the TaskServer
Click the Create service buttons to re-create the services
Hint
When any of the TaskServers do not start after the above steps, make sure the MD/TaskServer directory is fully owned by the user who started MDMaintenance:
sudo chown <username> -R /home/<username>/MD/TaskServer
The MedeA update has been completed and skip to the last section After Updating to 3.8
1.6.4. Update from the Materials Design Update Server
Warning
Update from the Web is not supported if you are updating from older versions of MedeA (3.0, 2.22, and older) to 3.8, please refer to the previous sections on updating to 3.8 with the Windows Installer or ISO images.
If you have installed or updated to MedeA 3.1.0 or newer via the Windows Installer or ISO images, you can then use the Update from the Web option in MDMaintenance to update to newer versions of MedeA, including point releases such as MedeA 3.1.2 or new major releases such as MedeA 3.8.
To update from the Materials Design Update Server via the internet, you will need a username and password (credentials) to access the server. If you haven’t received credentials yet, send an email to MD Support to receive the updated credentials. You can always retrieve or change your password at my.materialsdesign.com/user/password, provided you are not signed in.
The first step is to stop every running JobServer and TaskServer.
On Windows, start MDMaintenance as administrator: Windows Start Menu >> Materials Design, right-click on MD Maintenance >> More >> Run as administrator
On Linux, change to the directory <install_dir>/Linux-x86_64 and start MDMaintenance with sudo rights:
sudo ./MDMaintenance
Note
Start MDMaintenance with administrator rights to stop the JobServer and TaskServer services

Click Manage MD services, click Stop service buttons to stop the JobServer and TaskServer.
Click Continue to go back to the home menu:
In the MedeA Software manager mark the checkbox of the option Update from the Web and confirm with Start.
Ensure the Select an update server box is http://update.materialsdesign.com and click on Next to continue.

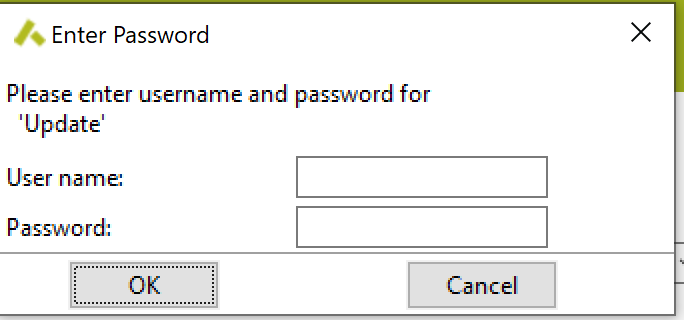
In the appearing prompt enter as Username your Materials Design user-ID or email address and provide your Materials Design password, then click OK.
The Updater will restart to update MDMaintenance itself. Click Yes to continue.
After MDMaintenance restarted, click Update from the Web to repeat steps 4-6.
MDMaintenance will first perform an analysis to determine the necessary changes. Click the Next button.

The update will start and necessary changes will be downloaded from the update server to your local copy.
After the update finished, click the Next button to exit.
Your MedeA installation has been updated to a newer point release, e.g., MedeA 3.1.2, or a new major release, e.g., MedeA 3.8. In case of the point release, your 3.1 license will still work so you would not need to request a new license. However, if you have updated to 3.8, you would need to request a new license from MD Support
1.6.5. Update on Linux on the Command-Line
Whenever possible, please update MedeA with the graphical user interface, and the option to update MedeA on the command-line is experimental and should be reserved for administrator staff and experienced users.
1.6.5.1. Stopping and Removing Existing JobServer and TaskServer Services
Stop the existing JobServer and TaskServer
With MedeA 3.0 and older (2.22, 2.21, etc):
sudo /etc/init.d/mdjobserver stop
sudo /etc/init.d/mdtaskserver stop
With MedeA 3.1 and newer:
sudo systemctl stop mdjobserver.service
sudo systemctl stop mdtaskserver.service
In MedeA 3.0 and older (2.22, 2.21, etc), remove the JobServer and TaskServer service scripts:
sudo rm -rf /etc/init.d/mdjobserver
sudo rm -rf /etc/init.d/mdtaskserver
1.6.5.2. Mounting the ISO Image on Linux
Use an existing directory or create a directory for the mounted drive, e.g.:
sudo mkdir -p /media/medea
Mount the ISO image as a loop device:
sudo mount -o loop MedeA_3.8.0.iso /media/medea
1.6.5.3. Performing the Update on the Command Line
Move to the mounted drive, change to the
Linux-x64_64directory, and start MDMaintenance without sudo rights:cd /media/medea/Linux-x86_64 ./MDMaintenance -update
Hint
You can use
./MDMaintenance -helpto show a list of optionsChoose the existing directory to update:
Welcome to the Materials Design Updater 3.8.0
Update directory [/home/medea/MD]:
Hit
return/enterand follow the prompt. The updater will first move the content of the2.0folder one directory up, and update MedeA.Update of the MedeA core components is complete:
Installing Libraries & Setting Permissions

done.

The update is complete.

Please don't forget to cite MedeA as required by the license agreement:
Results obtained using the MedeA(R) software environment (1).
(1) MedeA(R)-3.8, Materials Design, Inc., San Diego, CA, USA, 2023.
Next we will create the JobServer and TaskServer. Change to the updated installation directory, e.g.,
/home/<username>/MD/Linux-x86_64and enter:sudo ./MDMaintenance.x -createjobserver sudo ./MDMaintenance.x -createtaskserver
The JobServer and TaskServer scripts are created in the
/etc/systemd/systemdirectory.Start the JobServer and TaskServer
sudo systemctl start mdjobserver.service
sudo systemctl start mdtaskserver.service
You can use the following commands to check the status of the services:
sudo systemctl status mdjobserver.service
sudo systemctl status mdtaskserver.service
or
wget localhost:32000
wget localhost:23000
Finish the update
1.6.6. After the Update
- Check if the JobServer and TaskServer are updated to 3.8 and up and running. See Checking, Starting, and Stopping JobServer and TaskServer for more details.
- Open MedeA GUI and send the new license parameters to MD Support